When setting up a chicken coop, new keepers often focus on the big items: the walls, the roof, the nesting boxes. But one of the most crucial elements for your flock's health, happiness, and safety is often an afterthought—the roosting bars.

Read Next
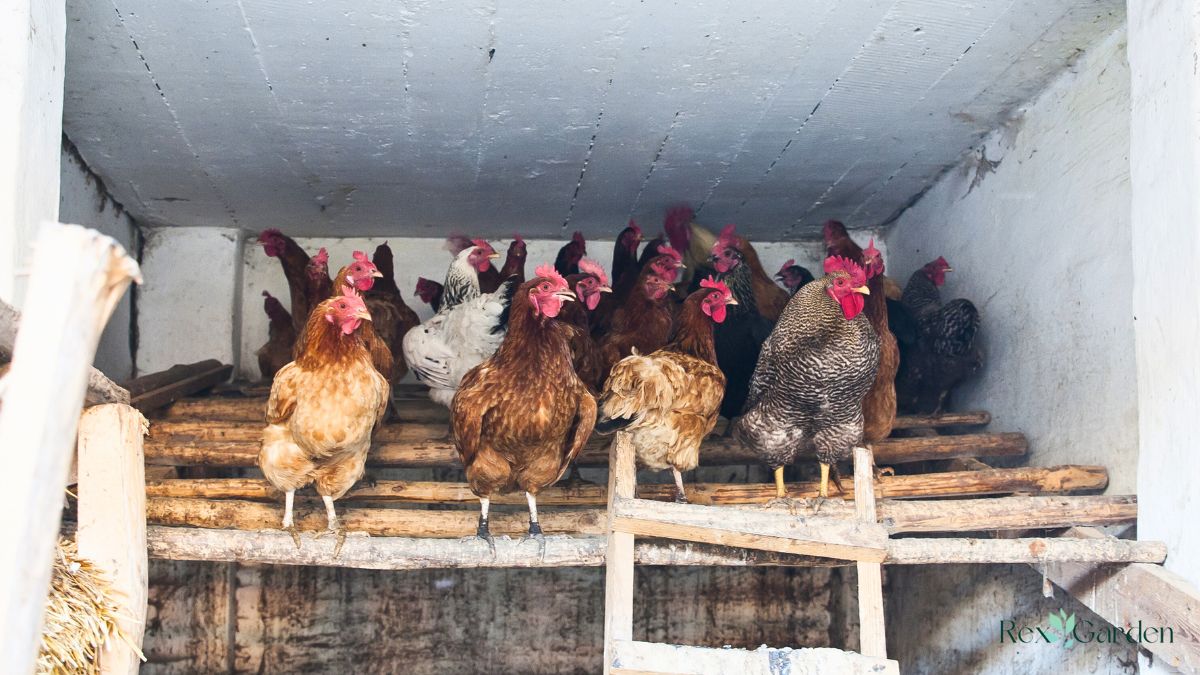
Chickens have a deep natural instinct to roost up high at night, a behavior inherited from their wild ancestors who slept in trees to avoid predators. Providing them with a proper place to roost is not a luxury; it's an essential part of good chicken care.
Fortunately, building the perfect roosting bars is one of the easiest and most rewarding DIY projects for any chicken keeper. You don’t need to be an expert carpenter to create a safe and comfortable sleeping space for your flock.
This guide will walk you through the key principles of a great roosting bar and provide you with three simple DIY designs you can build this weekend.
Why Roosting Bars are Absolutely Essential
Before we grab the tools, it's important to understand why roosting bars are so critical to your flock's well-being.
Safety and Security
The instinct to get off the ground at night is hardwired into a chicken's DNA. Roosting high gives them a sense of security and safety from ground-level predators. A flock that feels secure will be less stressed and healthier overall.
Health and Hygiene
Chickens produce a lot of manure while they sleep—in fact, about a third of their daily droppings happen at night. If they sleep on the floor of the coop, they are forced to lie in their own waste. This is a major health hazard that can lead to respiratory issues from ammonia fumes, parasite infestations, and bacterial infections like bumblefoot. Roosting bars lift them up and away from the soiled bedding.
Coop Cleanliness
A well-placed roosting bar concentrates the nighttime droppings into one predictable area. Placing a "droppings board" or a thick layer of bedding underneath the roosts makes daily coop cleanup incredibly fast and efficient.
Social Structure
The "pecking order" is a real and important part of flock dynamics. The highest-ranking birds will often claim the highest spots on the roost. Providing ample roosting space at various heights (if desired) can help maintain social harmony and reduce squabbles at bedtime.
Key Principles of a Perfect Roosting Bar
Not all perches are created equal. To build a roost that is safe, comfortable, and beneficial for your chickens, follow these fundamental design principles.
The Best Shape and Size
Forget thin dowels or round closet rods. While they might seem logical, a round perch forces a chicken to constantly grip with its tendons all night long, which can lead to foot cramps and stress.
The gold standard for a roosting bar is 2x4 lumber with the 4-inch side facing up. This wide, flat surface allows the chicken to rest its body on the perch, covering its feet entirely with its feathers and warm belly. This is crucial for preventing frostbite in the winter and provides a stable, comfortable platform that mimics a sturdy tree branch. Rounding the sharp edges of the 2x4 with a sander is a great finishing touch.
The Right Material
Natural, untreated wood is the best and only material you should use. Pine is an excellent, affordable choice. Avoid using plastic or metal, as these materials are slippery, get extremely cold in the winter (risking frostbite), and don't provide the right texture for a secure grip. Do not use pressure-treated wood, as the chemicals can be harmful to your flock.
Proper Height
Chickens want to roost as high as possible. A good height range is anywhere from 18 inches to 4 feet off the ground, depending on the size of your coop and your breeds. For heavy breeds like Orpingtons or Brahmas who aren't great flyers, it's best to create a tiered or ladder-like system so they can easily hop up to the main roost.
Correct Spacing
- Space Per Bird: Plan for about 10-12 inches of roosting space per chicken. Always provide more space than you think you need to prevent nighttime crowding and arguments.
- Space Between Bars: If you are installing multiple roosting bars, they should be spaced at least 12-15 inches apart horizontally. They should also be staggered in height, like stadium seating, so that birds on the higher roosts are not pooping directly on the birds below them.
Ideal Placement
Roosting bars should be placed in the highest, most protected part of the coop, far away from drafts. Critically, they should never be placed directly above food, water, or the nesting boxes.

3 Simple DIY Roosting Bar Designs
Here are three easy-to-build designs that work for a variety of coop sizes and skill levels.
Design 1: The Simple Ledge Roost
This is the easiest and most common design, perfect for attaching directly to your coop walls.
Materials Needed:
- One 2x4 piece of lumber, cut to the desired length of your roost.
- Two 2x4 pieces of lumber, each cut to about 6-8 inches long to act as support brackets.
- 3-inch wood screws.
- A drill and a sander (or sandpaper).
Step-by-Step Instructions:
- Prepare the Wood: Measure the width of your coop where you want to place the roost and cut the main 2x4 to that length. Sand all the pieces of wood, paying special attention to rounding the top edges of the long roosting bar to make it comfortable for your chickens' feet.
- Attach the Supports: Decide on the height for your roost. Secure one of the 6-inch support brackets to the coop wall with several wood screws, ensuring it is level. Repeat on the opposite wall, making sure the second bracket is perfectly level with the first.
- Install the Roosting Bar: Place the long 2x4 roosting bar on top of the two support brackets, with the wide, 4-inch side facing up.
- Secure the Roost: Drill down through the top of the roosting bar into the support brackets below using at least two screws on each side. This will keep the bar from twisting or falling.
Design 2: The Freestanding Roosting Ladder

This design is excellent for larger coops or for anyone who wants a roosting system that can be easily removed for deep cleaning.
Materials Needed:
- Two 8-foot long 2x4s for the legs/frame.
- Two or three 4-foot long 2x4s for the roosting rungs.
- 3-inch wood screws.
- A drill and a saw.
Step-by-Step Instructions:
- Cut the Legs: Cut one of the 8-foot 2x4s in half, giving you two 4-foot sections. These will form one side of your "A-frame." Repeat with the second 8-foot board.
- Assemble the A-Frames: Lay two of the 4-foot sections on the ground and angle them together at the top to form a triangle or "A" shape. Secure them at the peak with several wood screws. Repeat this step to create the second A-frame.
- Attach the Roosts: Stand the two A-frames up, spaced about 4 feet apart. Start with the highest roosting bar. Place it across the two frames at your desired height (e.g., 3 feet high), making sure it's level. Secure it to the legs with screws.
- Add Lower Rungs: Attach the second roosting bar lower down and slightly forward from the top one, like a ladder step. A good spacing is about 12-15 inches down and 12-15 inches forward. This staggered design allows chickens to easily hop up and prevents pooping on birds below.
- Add Support (Optional): For extra stability, you can add a cross-brace near the bottom of the A-frames.
Design 3: The Tiered "Stadium Seating" Roost
This is an efficient design for larger flocks in a coop with ample vertical space.
Materials Needed:
- Two large pieces of ¾-inch plywood, cut into a right-angled triangle shape (e.g., 24 inches tall and 36 inches long).
- Several 2x4s, cut to the desired length of your roosts.
- 3-inch wood screws.
Step-by-Step Instructions:
- Mount the Supports: Attach the two triangular plywood supports to the opposite walls of your coop, ensuring the right angle is in the bottom corner and the long, sloped side is facing up.
- Mark Your Roost Locations: On the sloped edge of the plywood, mark the locations for your roosting bars. Remember to keep about 12-15 inches of vertical and horizontal space between each one to create a staggered ladder effect.
- Attach the Roosts: Starting with the highest roost, place your 2x4 bar across the two plywood supports. Secure it by drilling screws through the outside of the plywood and into the end of the 2x4. Repeat this process for each of the lower roosts.
Conclusion
Building your own DIY roosting bars is a simple, inexpensive project that pays huge dividends for the health and happiness of your flock. By following the core principles—using a 2x4 with the wide side up, choosing untreated wood, and ensuring proper spacing—you can create the perfect sleeping quarters for your chickens. A good roost isn't just a piece of wood; it's a safe haven, a clean bedroom, and the foundation of a peaceful coop.
Comments
No Comments