Making hummingbird nectar is simple and cheap to the extent you can hardly find it necessary to head to a store just to buy it. You just need a little water and sugar, mix them in appropriate proportions and you will be good to go. Preferably, sugar to water ratio of 1 to 4 parts is considered alright in many situations.
Read Next
You shouldn’t use any sugar substitute when making nectar since there is entirely no need for hummingbirds to have a special diet plan. Insist on using white sugar and not brown one or gelatin. Besides, you need to avoid food color additives since they can harm the birds and that is the last you would want to do if you truly wish well for birds.
Nectar being an organic substance, naturally, it is expected to decay and the organic breakdown can result in molds, fungi, and other compounds that can harm hummingbirds. Besides that, decaying nectar quickly loses its nutritional value and it can also badly ferment and produce a smell that can only drive the birds away.
Decayed nectar often gets sticky and can coat birds’ bills thereby making their breathing uncomfortable. Though often it is difficult to have many visible signs of decaying nectar, any signs of the following should immediately alert you on considering nectar replacement.
- Murky/Cloudy nectar appearance
- Floating insects inside a feeder
- Sticky residues at the base of the feeding ports
- Black or white string-like structures floating on the nectar
The question you will have to deal with most of the time is how frequently should you change nectar so that a hummingbird only feeds on nectar of good quality. Should it be after a day or two, a week, or just when you feel like it? The thought can be best addressed by considering the following situations.
Consider The Outside Temperature Conditions
Hummingbird nectar should be fresh throughout. You should change it as often as necessary so that it can have the right freshness. The decision to consider bringing in new nectar just depends on how outside temperature influences what is going on with the sugar-water parts in the nectar. Here is a table that can appropriately guide you on how often to change nectar based on outside temperature influence.
- Temperature: 71-75°F (23-25°C); change every 6 days
- Temperature: 76-80°F (25-27°C); change every 5 days
- Temperature: 81-84°F (27-29°C); change every 4 days
- Temperature: 85-88°F (29-31°C); change every 3 days
- Temperature: 89-92°F (31-33°C); change every 2 days
- Temperature: 93°F+ (33°C+); change daily
To make things simple, premix nectar is put in the refrigerator, and just pour as needed instead of preparing a new solution anytime nectar change becomes necessary.
You should change nectar anytime you notice mold growth on it
Mold reduces the quality of hummingbird feed and it mostly occurs if a feeder isn’t well taken care of. The presence of molds in nectar can be confirmed by the existence of mostly white and sometimes black spots. Mold growth can be accelerated if a feeder gets cleaned less often and also if nectar stays in a feeder for unreasonably too long. Sometimes, hot water is enough to clear mold growth from a nectar solution.
However, vinegar solution is what works best therefore you can resort to cleaning a feeder with vinegar before pouring nectar into it. Vinegar has a bad odor that can prevent hummingbirds from enjoying the nectar. You can take precautions to diminish bad vinegar odor using hot water rinse before adding nectar to a feeder.
Where You Place The Hummingbird Nectar


Though the window is considered the best place to place hummingbird nectar, the problem is that excessive heat and sunlight exposure can make it go bad quickly. Sunny conditions often cause nectar to show black spots and turn milky. If you want to avoid that problem, it is a thoughtful idea to place nectar feed in a shed where the influence of heat and sun is considered reasonable.
If you place nectar in an exposed point, it will quickly go bad, and therefore have to change it frequently. In shade conditions, nectar stays fresh for a reasonably long time without having to necessary consider frequent replacements.
Problems With Ants


Ants love to feed on sugary stuff and the presence of nectar can surely attract them. Hummingbirds don’t feed on nectar contaminated with ants. Therefore, if you notice ants in nectar, you should prepare a new one. To avoid frequent changes (ants will always find nectar regardless of where it is placed), you can consider having ant guards around a nectar feed.
Applying Vaseline around ridges of a feeder can prevent the ants from reaching the nectar solution and thereby make hummingbirds feed in peace. Don’t resort to killing ants using agents such as Tanglefoot. Doing that isn’t ecologically acceptable and the bad thing is that such agents can kill Hummingbirds too.
>>> Read More: The Best Hummingbird Feeder: Top 5 Reviews and Buying Guide
The Condition Of The Feeder
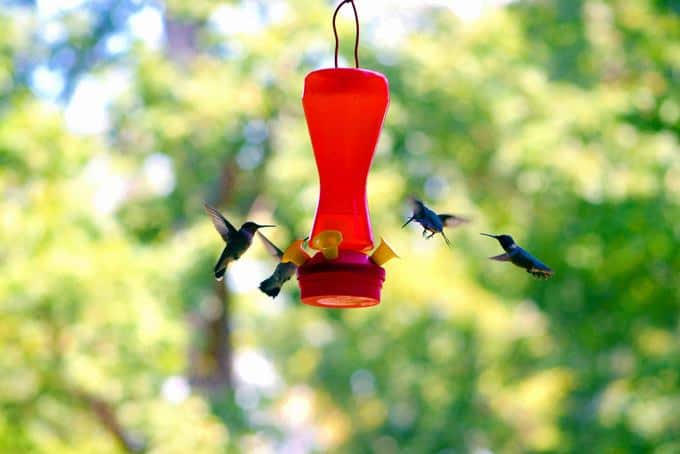


A contaminated feeder makes nectar ferment quickly. Even if you use the best sterilizing agent you can lay your hands to disinfect nectar, the moment a hummingbird gets its feet and beak on a feeder, new episodes of feeder contamination will begin immediately. The more the rate of contamination, the more frequently you should consider nectar replacement.
If you put nectar in a feeder that is mostly contaminated, you should prepare yourself for frequent replacement sessions. However, by routinely cleaning the feeder, incidences of contamination can significantly reduce thereby enabling nectar to stay fresh for a long, hence reducing the need to consider unreasonably many replacements.
It can be rewarding to clean your feeder once every week or two. For the best results, you can disassemble all its parts and make sure that you thoroughly brush all the corners and surfaces that can hide contaminations. After that, allow the feeder to dry before putting it to use. Doing that will add the length of time nectar stays fresh when in a feeder and thereby reduce calls for frequent changes.



Comments
No Comments