
Growing your own food is incredibly satisfying, but traditional root gardening requires heavy digging, pristine soil, and a massive amount of backyard space. If you have rocky soil, a small patio, or a bad back, burying potatoes in trenches might feel entirely out of reach.
Read Next
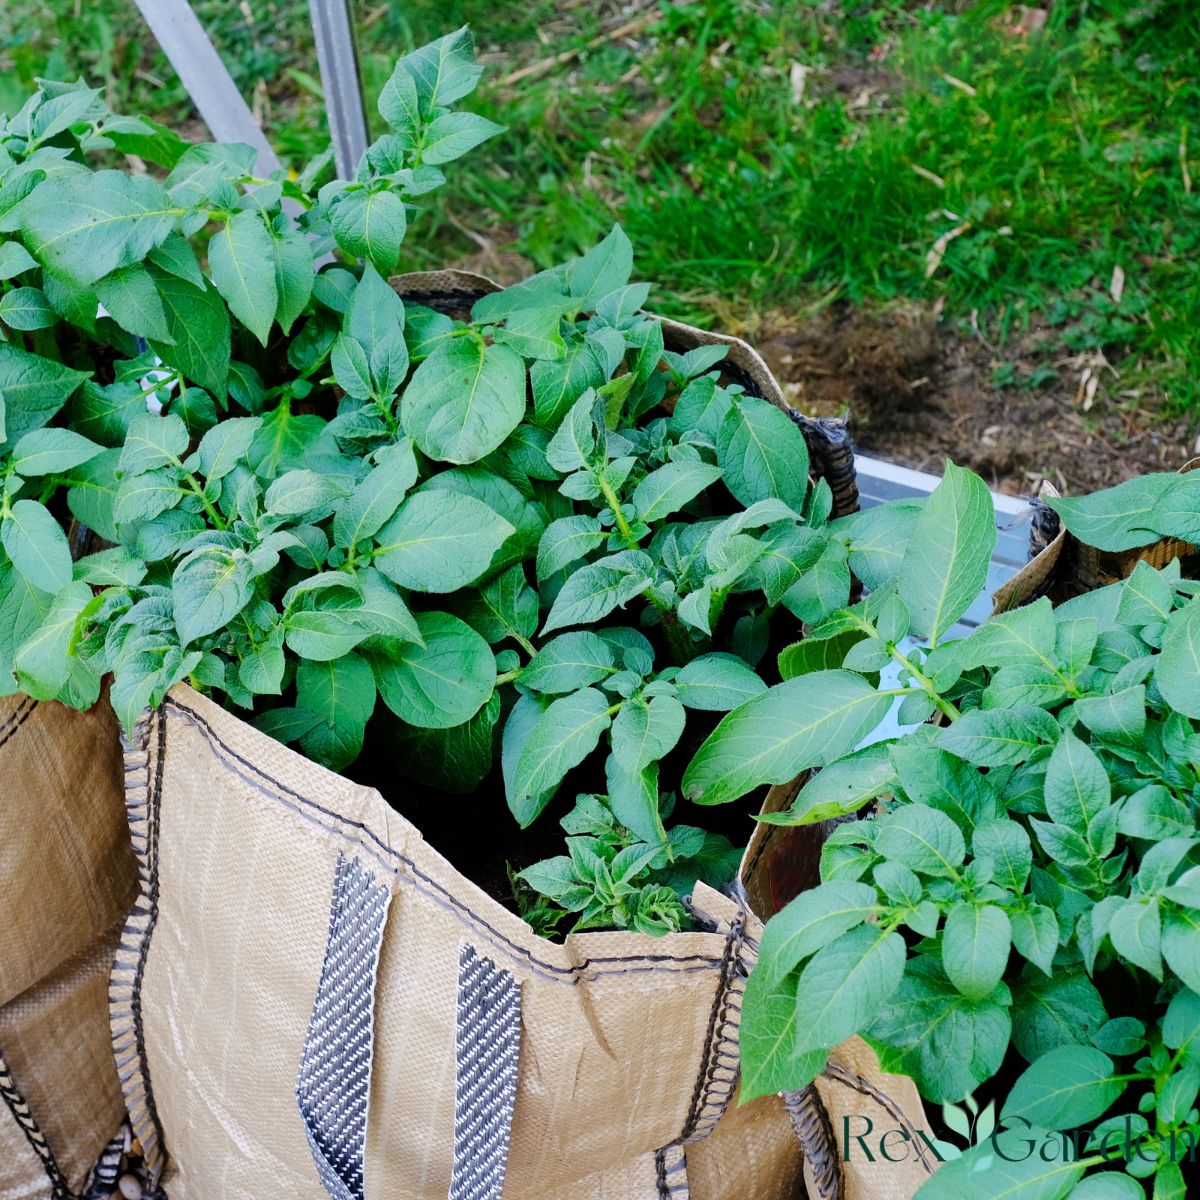
Enter fabric grow bags. By switching to breathable container gardening, you can easily pull a massive 100-pound harvest of spuds out of a surprisingly tiny footprint.
Here is the exact blueprint to hitting that 100-pound milestone, from calculating your gear to the final harvest.
The 100-lb Math: What You Need
To hit 100 pounds of potatoes, you need to understand the average yield metrics. On average, a healthy potato plant grown in a fabric bag yields about 2 to 3 pounds of potatoes.
To safely clear the 100-pound mark, you should aim to grow roughly 35 to 40 plants. This breaks down to a highly manageable equipment list:
- Bags: Five to seven 15-gallon fabric grow bags (or roughly ten 10-gallon bags).
- Seed Potatoes: 10 to 12 lbs of certified seed potatoes (budgeting about 3 to 4 seed eyes per 15-gallon bag).
- Soil Blend: A loose mixture of 60% high-quality potting soil, 20% compost, and 20% perlite or peat moss.
Step-by-Step Planting and Growing Guide
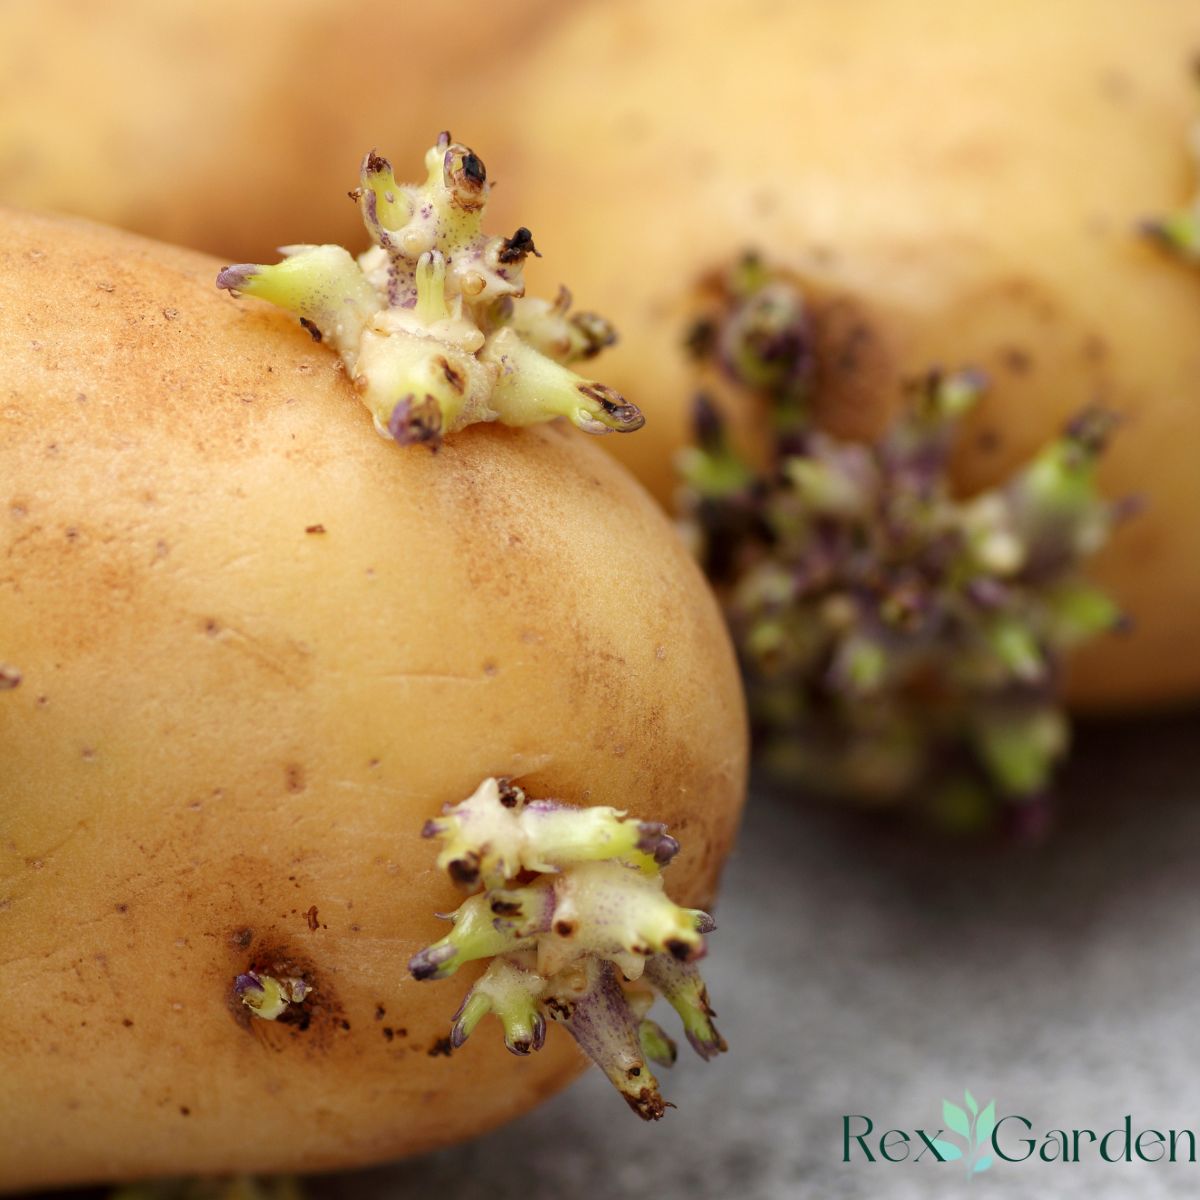
1. Chitting (Sprouting) the Seed: 2-3 weeks before planting.
Buy certified disease-free seed potatoes. Place them in an empty egg carton in a cool, bright room. The "eyes" will begin to sprout thick, green shoots called chits. Once the chits are about a half-inch long, they are ready to plant. If they are large, you can slice them into chunks, ensuring each chunk has at least two strong sprouts. Let the cut sides dry for 24 hours.
2. The Initial Plant: Day 1.
Roll down the sides of your fabric grow bags so they are only about ⅓ of their full height. Fill the bottom with 4 to 6 inches of your loose soil mix. Place 3 to 4 seed potato chunks on top of the soil with the sprouts facing up. Cover them with another 3 to 4 inches of soil and water deeply.
3. The Hilling Process: Weeks 3 to 8.
As your potato plants grow upward, they will push out leafy green stems. When the stems reach about 6 to 8 inches high, unroll the fabric bag a bit and add more soil mix around the base of the plant, leaving just the very top leaves exposed. Repeat this "hilling" process every time the plant grows another 6 inches until the bag is full to the top.
4. Watering and Feeding: Ongoing maintenance.
Fabric bags breathe incredibly well, which prevents root rot but means they dry out faster than plastic pots. Keep the soil consistently moist but never soggy—like a wrung-out sponge. Feed them every two weeks with a low-nitrogen, high-potassium organic fertilizer to encourage tuber growth rather than just leafy tops.
Why Fabric Bags Outperform the Ground
Traditional plastic pots can cause roots to circle around the edges, becoming tightly "root-bound" and limiting your harvest. Fabric bags solve this via air-pruning.
When the roots reach the breathable fabric wall, they are exposed to air, which naturally stops their forward growth and signals the plant to shoot out a highly branched network of vibrant feeder roots. More healthy roots mean more entry points for water and nutrients, resulting in significantly larger yields.
Harvesting Your 100-Pound Reward
A few weeks after your potato plants flower, the leaves will begin to turn yellow and entirely die back. This is completely normal—it means the plant is shifting all its final energy into the tubers underground.
Once the foliage is completely dead, stop watering and wait about one week for the potato skins to toughen up for better storage.
The absolute best part of using fabric grow bags? Harvesting is a breeze. Instead of carefully digging with a pitchfork and accidentally puncturing your crop, you can simply tip the grow bags over onto a tarp or wheelbarrow. Gently sift through the loose, fluffy soil, and watch your 100-pound mountain of fresh, pristine potatoes roll right out!
Comments
No Comments